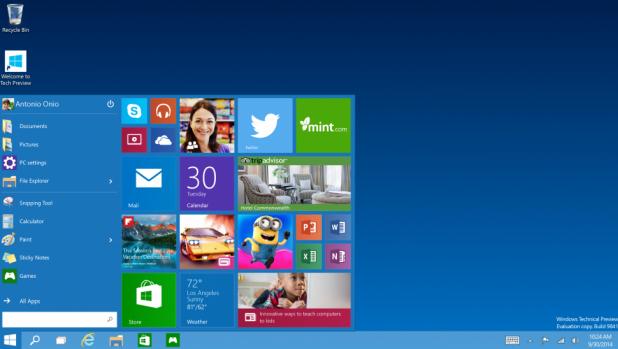
With the release of Windows 10, Microsoft decided to bring back
the Start menu that many users complained about missing in Windows
8. However, the new Start menu also includes an area for live
tiles which work similarly to the ones in the old release of
Windows. Using the steps in this tutorial, you can customize the
Start menu to suit your needs and workflow.
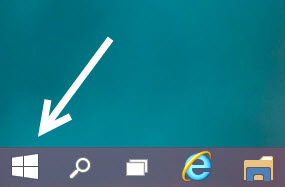
1. Click the Windows logo at the bottom left of the screen to open the Start menu. Alternatively, you can open it by pressing the Win logo on your keyboard.
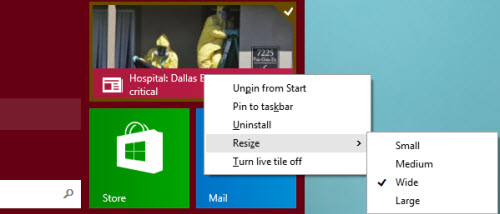
2. When the Start screen appears, you will see a grid of live tiles on the right size. If you right-click on one of them, you will see several options including: Unpin from Start, Pin to taskbar, Uninstall, Resize, and Turn live tile off. Under Resize, there are several sizes from which to choose: small, medium, wide, and large. As soon as you choose the size, the chosen tile will be changed and moved accordingly. The size of the Start menu will increase or decrease to adapt to the change, if necessary.
To move a tile, long-click on it, then drag it to the desired location. If there is a tile in that location, it will be moved to a slot nearby.
Un-pinned apps can still be found in the app list.
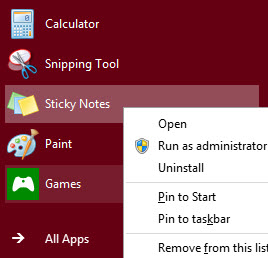
3. To pin a program to the Start menu, right-click on it, and choose Pin to Start. If it is a Metro app, you will see a live tile. Otherwise, the tile will contain the app’s icon.
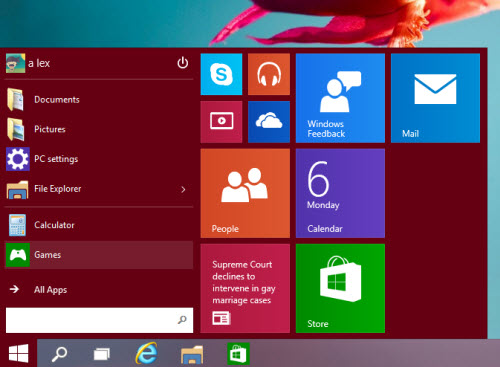
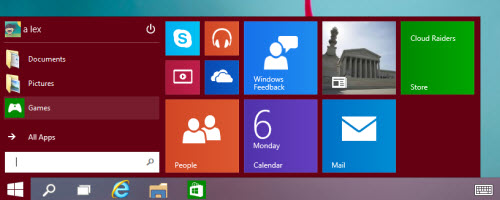
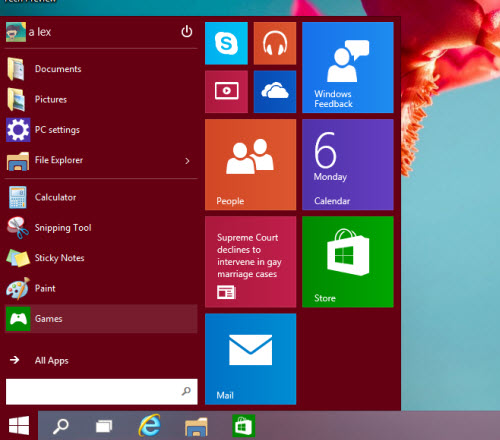
4. The Start menu can be resized to several predefined shapes as seen in the examples below. Resizing the Start menu is similar to resizing a normal app’s window. All you have to do is move the mouse to the top edge, and then drag it down until it resizes to the shape that you want.
1. Click the Windows logo at the bottom left of the screen to open the Start menu. Alternatively, you can open it by pressing the Win logo on your keyboard.

2. When the Start screen appears, you will see a grid of live tiles on the right size. If you right-click on one of them, you will see several options including: Unpin from Start, Pin to taskbar, Uninstall, Resize, and Turn live tile off. Under Resize, there are several sizes from which to choose: small, medium, wide, and large. As soon as you choose the size, the chosen tile will be changed and moved accordingly. The size of the Start menu will increase or decrease to adapt to the change, if necessary.
To move a tile, long-click on it, then drag it to the desired location. If there is a tile in that location, it will be moved to a slot nearby.
Un-pinned apps can still be found in the app list.

3. To pin a program to the Start menu, right-click on it, and choose Pin to Start. If it is a Metro app, you will see a live tile. Otherwise, the tile will contain the app’s icon.

4. The Start menu can be resized to several predefined shapes as seen in the examples below. Resizing the Start menu is similar to resizing a normal app’s window. All you have to do is move the mouse to the top edge, and then drag it down until it resizes to the shape that you want.


No comments:
Post a Comment